Easy Crochet Drawstring Pouch: Free Beginner Pattern
A small, sturdy cotton pouch resting on your desk keeps stray stitch markers and loose buttons within arm’s reach. This beginner-friendly project offers a reliable way to gain confidence with your hook while creating something genuinely useful for your home. You will work in a continuous spiral, avoiding awkward seam joins, which keeps the fabric smooth and uniform. The dense stitches provide a firm structure that holds its shape even when stuffed with heavy metal notions. Learning this simple method allows you to practice consistent tension and control, providing a foundation for larger projects like hats or market bags you might want to tackle later.
Why You’ll Love This Pattern
Creating a classic crochet drawstring pouch is a satisfying way to practice working in the round while producing a functional accessory for your home. This project works up quickly, making it an excellent choice for using up leftover yarn scraps from previous sweaters or blankets. Because the construction uses simple single crochet stitches, it is highly meditative and ideal for taking along on short trips or working on while watching television. The finished size is perfect for storing small notions like stitch markers, buttons, or jewelry, and the adjustable drawstring closure keeps your items secure.
I managed to finish this little pouch in a single afternoon using some leftover cotton yarn. The instructions are very clear, and the bag turned out exactly the right size for my tape measure and scissors.
— Sarah, hobbyist crafter
Pattern Overview & Skill Level
- Skill Level: Beginner
- Approximate Time: 2–3 hours
- Construction: Worked in a continuous spiral from the bottom up to the drawstring eyelet row, finished with a simple foundation chain cord.
- Finished Dimensions: 4 inches wide by 5 inches tall.
Materials & Supplies Needed
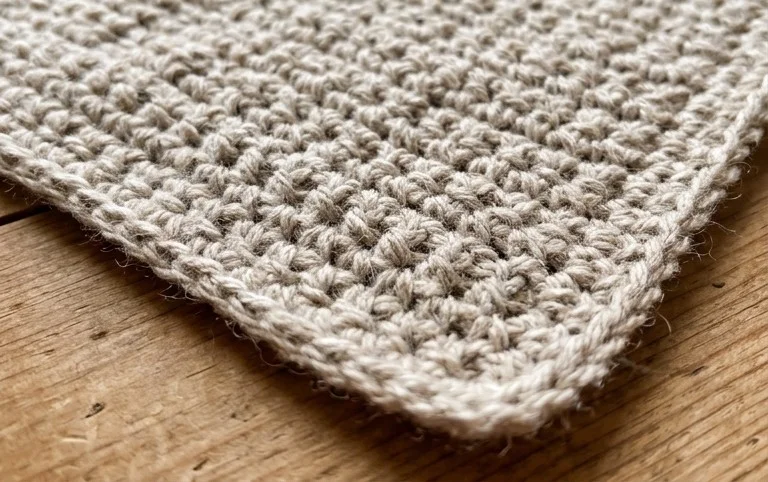
- Yarn: Worsted weight (#4), 100% cotton, approximately 60 yards. Cotton provides the structural integrity needed for a pouch to hold its shape well.
- Hook Size: 4.5 mm (US 7) hook. This size creates a tight, dense fabric that prevents small items from falling through.
- Notions: Tapestry needle for weaving ends, stitch marker to track the start of rounds, and scissors.
- Yarn Substitutions: Acrylic worsted weight yarn can be substituted for a softer feel, though the bag may stretch more over time. Wool will provide a sturdier, more “felted” look if washed, but keep in mind that wool can be more difficult to clean than cotton.
Stitch Guide & Abbreviations (US Terms)
- ch = chain
- sc = single crochet
- inc = increase (work 2 sc into the same stitch)
- st/sts = stitch/stitches
- sl st = slip stitch
- YO = yarn over
- Stitch Marker = A small plastic clip used to mark the first stitch of every round to keep the spiral pattern accurate.
Step-by-Step Pattern Instructions
Pouch Base and Body
- Rnd 1: Start with a magic ring, work 6 sc into the ring (6 sts).
- Rnd 2: Work 2 sc in each st around (12 sts).
- Rnd 3: 1 sc, inc repeat from * to * around (18 sts).
- Rnd 4: 1 sc, inc, 1 sc repeat from * to * around (24 sts).
- Rnd 5: 3 sc, inc repeat from * to * around (30 sts).
- Rnd 6: 2 sc, inc, 2 sc repeat from * to * around (36 sts).
- Rnd 7–20: Work 1 sc in each st around for 14 rounds (36 sts).
Eyelet Row and Finishing
- Rnd 21: ch 2, skip 2 sts, 1 sc in next 4 sts repeat from * to * around (6 eyelets total).
- Rnd 22: 1 sc in each st and each ch-2 space around (36 sts).
- Finish: Sl st into the next stitch to level the edge. Fasten off and weave in your ends securely on the inside of the pouch.
Drawstring Cord
Using the same yarn, create a foundation chain of 60 stitches. Fasten off and knot the ends securely. Thread this chain in and out through the eyelets created in Rnd 21. Pull the ends to cinch the bag closed.
Care & Washing Instructions
- Hand wash in cool water using a gentle detergent specifically formulated for cotton fibers.
- Lay the pouch flat on a clean towel to air dry, reshaping it with your hands while damp to ensure the base remains flat.
- Avoid using a tumble dryer, as high heat can shrink the cotton fibers and cause the drawstring to lose its elasticity.
Pro Tips & Common Mistakes to Avoid
- Maintain consistent tension throughout the body; if you find your stitches are loose, drop down to a 4.0 mm hook to keep the fabric dense.
- Always place a stitch marker in the first stitch of every round; since this is worked in a continuous spiral, it is easy to lose your place without one.
- When weaving in your ends, go back and forth through the stitches at least three times to ensure the yarn does not pull out when the bag is cinched.
- To adjust the size, add or subtract rounds before the eyelet row, keeping in mind that each additional inch of height will require approximately 5–8 extra yards of yarn.
Frequently Asked Questions
Can I use a heavier yarn for this project?
You can use a bulky weight yarn, but you will need to reduce the number of initial increase rounds to avoid an overly large or floppy base.
Is this project suitable for a complete beginner?
Yes, this is an ideal beginner project because it only uses the single crochet stitch and works in a simple continuous round.
What is the best way to keep the drawstring from pulling out?
Make sure your knots at the ends of the drawstring chain are large enough that they cannot slip back through the eyelets. Alternatively, you can sew a small wooden bead to each end of the cord.
Can I sell the bags I make from this pattern?
You are welcome to sell finished items made from this pattern, provided you credit the design. Please do not redistribute the pattern text itself.
Your new pouch now sits ready to hold your favorite notions or a small gift for a friend. You could easily adjust the size by adding more rounds to the base or switching to a wool yarn for a softer, fuzzier texture. Sharing a photo of your work on social media helps other makers see how different color choices change the final look. Explore the rest of the blog for more free patterns to build your skills as you continue your journey with yarn and hooks.